Kerio Control VPN is an advanced virtual private network (VPN) solution that provides secure and encrypted connections between remote networks and user devices. Network and data security has become paramount with remote work’s increasing popularity. Kerio Control VPN Client, especially the version for macOS, is an indispensable tool that helps Apple users quickly access their company’s internal network securely from anywhere. The article below will provide an overview and in-depth look at Kerio VPN Client Mac OS, from setting up and configuring to troubleshooting, helping users maximize this tool for their networking needs.
Downloading Kerio VPN Client Mac OS
Downloading Kerio VPN Client Mac OS involves a straightforward process that securely connects Mac users to remote networks via the Kerio Control VPN. Here’s how to get started:
Visit the Official Kerio Control Website: Start by navigating to the official website of Kerio Control. This ensures that you’re getting the software directly from the source, maintaining the integrity and security of the download.
Find the download section: On the Kerio Control website, look for the download section or a page dedicated to the Kerio Control VPN Client. This area typically includes download options for different operating systems.
Select the macOS version: Select the version specifically designed for macOS within the download options. This ensures compatibility with your operating system and optimizes performance.
Download the installer: Click on the download link for the macOS version of Kerio Control VPN Client. The download should start automatically. If prompted, choose a location on your Mac where you wish to save the installer file.
Verify the download: Once the download is complete, it’s a good practice to verify the integrity of the installer file. This can usually be done by checking the file’s checksum or signature and comparing it with the information provided on the Kerio Control website.
Prepare for installation: Before proceeding, ensure that your macOS meets any system requirements specified by Kerio Control. This might include having a specific macOS version or ensuring sufficient storage space.
Following these steps will help you successfully download the Kerio Control VPN Client for your macOS, preparing you for the next steps in the installation process. Remember to download software only from official or trusted sources to avoid the risks associated with malware or other malicious software.

Configuring Kerio VPN Client Mac OS
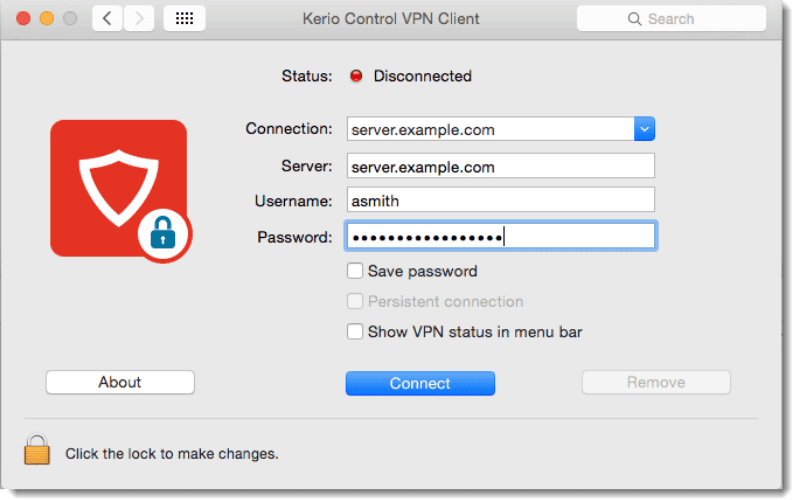
Configuring the Kerio VPN Client Mac OS requires a series of steps to ensure a secure and efficient connection to your remote network. After successfully downloading and installing the Kerio Control VPN Client, follow these guidelines to configure it:
1. Launch Kerio Control VPN Client
Open the Kerio Control VPN Client from your Applications folder. On the first launch, you should grant permission or enter your macOS user password to authorize the application.
2. Add a new VPN connection
In the VPN Client interface, look for an option to add or create a new VPN connection. This might be represented by a “+” sign or an explicit “Add New” button.
3. Enter VPN server details
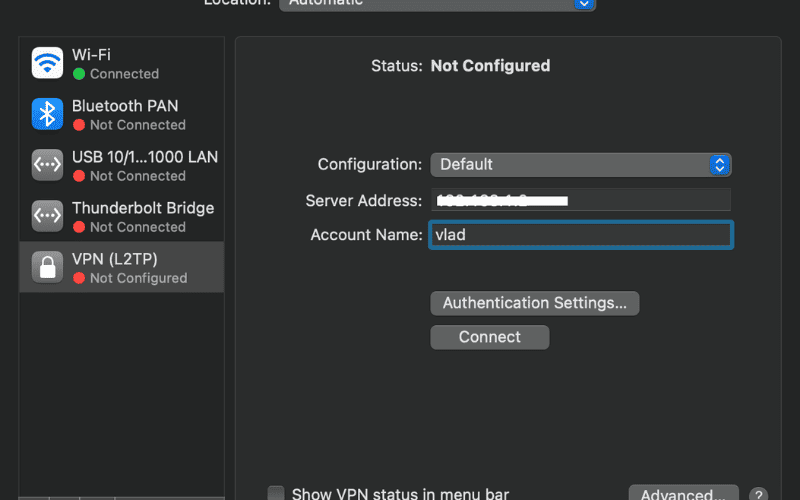
You will be prompted to enter the details of the VPN server you wish to connect to. This typically includes the server’s address (IP or domain name) and possibly a port number. Your network administrator or the documentation for your specific Kerio Control setup should provide these details.
4. Authentication information
Input your authentication credentials, which usually consist of a username and password. Depending on your organization’s setup, you might also need to use additional authentication methods like tokens or certificates. Ensure this information is accurate to avoid connection issues.
5. Configure advanced settings (Optional)
If needed, configure advanced settings based on your specific requirements or the instructions provided by your network administrator. This could include settings like turning specific encryption protocols on/off, adjusting connection timeouts, or specifying routes.
6. Save and connect
After entering all the necessary information, save your VPN profile. Look for a “Connect” button to initiate the VPN connection. The first connection attempt may take a few moments as the VPN client establishes a secure channel with the server.
7. Verify connection status
Once connected, the Kerio Control VPN Client should indicate a successful connection status. You might verify connectivity by accessing internal resources or checking your IP address to ensure it aligns with the expected network.
8. Troubleshooting
If you encounter connection issues, double-check your configuration settings for errors. Consult the Kerio Control documentation or your network administrator for troubleshooting steps specific to common problems like authentication failures or server unreachability.
9. Regular updates
Keep the Kerio Control VPN Client updated to the latest version to ensure compatibility with macOS updates and to benefit from security patches and new features.
Following these steps, you can configure the Kerio VPN Client Mac OS device, enabling secure access to your organization’s network from remote locations. Ensure your VPN connection is active when accessing sensitive resources to maintain security and privacy.

Uninstalling Kerio Control VPN Client on Mac OS
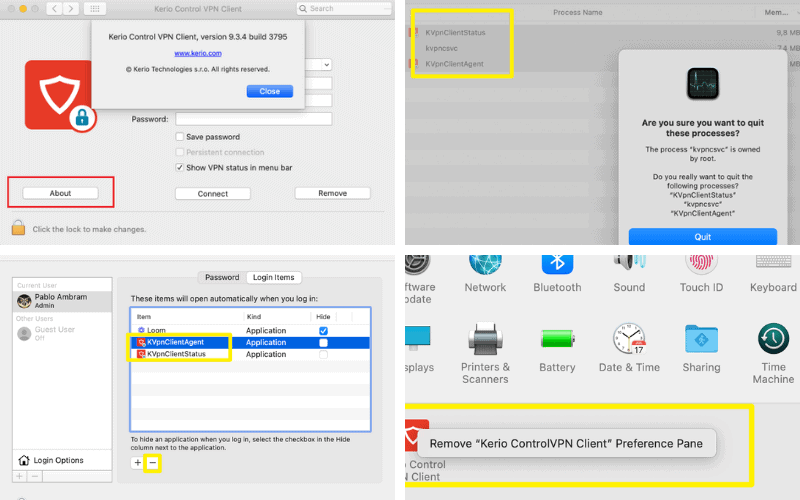
Uninstalling the Kerio Control VPN Client from your macOS device can be straightforward. However, following the correct steps is essential to completely removing the application and its associated data. Here’s how you can uninstall the Kerio Control VPN Client on macOS:
1. Quit Kerio Control VPN Client
Ensure that the Kerio Control VPN Client application is not running. You can quit the application by clicking on the Kerio Control VPN Client icon in the dock, then selecting “Quit,” or using the Command + Q shortcut after selecting the application window.
2. Open finder
Open the Finder application from your dock to begin the uninstallation process.
3. Navigate to the Applications folder
In the Finder sidebar, click on the “Applications” folder to view all installed applications on your macOS device.
4. Locate Kerio Control VPN Client
Scroll through your applications list or use the search feature at the top right of the Finder window to locate the Kerio Control VPN Client application.
5. Drag to Trash
Once you’ve found the Kerio Control VPN Client, click and drag its icon to the Trash bin in your dock. Alternatively, you can right-click (or control-click) on the application and select “Move to Trash” from the contextual menu.
6. Empty the Trash
Right-click the Trash bin icon in your dock and select “Empty Trash” to permanently remove the Kerio Control VPN Client application from your system. Confirm the action if prompted. For safety, ensure you can permanently delete all items in the Trash.
7. Remove configuration files (Optional)
Some applications leave behind configuration files. To remove these from the Finder menu, select “Go”> “Go to Folder…” and type ~/Library/ to access your user’s Library folder.
Look for folders named after Kerio or the VPN client in the ~/Library/Preferences/ and ~/Library/Application Support/ directories. If you find any, move them to the Trash and empty them.
8. Restart your computer (Optional)
After uninstalling the application and removing its associated files, restart your computer to ensure all changes take effect.
Following these steps, you can uninstall the Kerio Control VPN Client from your macOS device, ensuring no unwanted files are left behind. If you uninstall the application to troubleshoot an issue, consider checking the official Kerio or vendor documentation for additional uninstallation steps or tools.

Troubleshooting Kerio VPN Client Mac OS
Troubleshooting the Kerio Control VPN Client on macOS involves identifying and resolving issues preventing the VPN from successfully functioning or functioning correctly. Here are steps to diagnose and fix common problems:
1. Verify internet connection
Before delving into more complex troubleshooting steps, ensure your macOS device has a stable internet connection. A simple way to check is to disconnect from the VPN and attempt to access a website or service online.
2. Check VPN login credentials
Incorrect login credentials are a common issue that prevents VPN connections. Double-check your username and password. If you’re unsure about your credentials, contact your network administrator for confirmation or to reset your details.
3. Update Kerio Control VPN Client
Ensure you’re running the latest version of the Kerio Control VPN Client. Older versions might not be fully compatible with the latest macOS updates. Visit the official Kerio website to download the newest version.
4. Examine firewall and antivirus settings
Sometimes, macOS firewall settings or third-party antivirus software can block VPN connections. Check your firewall settings in “System Preferences”> “Security & Privacy”> “Firewall” and configure it to allow connections from the Kerio Control VPN Client. Similarly, review your antivirus settings to ensure the VPN isn’t being blocked.
5. Check for conflicting VPN services
If you have other VPN clients installed on your macOS, they might conflict with the Kerio Control VPN Client. Consider disabling or uninstalling other VPN services to eliminate potential conflicts.
6. Review the VPN server address and configuration
A proper server address or configuration settings can prevent a successful connection. Verify the server address and any specific configuration settings with your network administrator. Ensure these details accurately match in the Kerio Control VPN Client settings.
7. Restart Kerio Control VPN Client
Close and then restart the Kerio Control VPN Client. This can resolve temporary glitches that might be affecting the application.
8. Reboot your macOS device
Rebooting your device can resolve many connectivity issues. Save any open work and restart your macOS to see if this fixes the VPN connection problem.
9. Consult logs for error messages
The Kerio Control VPN Client generates logs that can provide insights into what might be going wrong. Access these logs through the client interface or locate them in the application’s folder within the Library directory. Look for any error messages that could indicate the source of the problem.
10. Contact support
If you’ve tried the above steps without success, it might be time to reach out for help. Contact your organization’s IT department or Kerio’s support team for assistance. Be ready to provide details about the issue, any error messages, and the troubleshooting steps you’ve attempted.
Troubleshooting VPN issues can be complex, given the myriad factors affecting connectivity. By methodically working through these steps, you can identify and resolve many common problems with the Kerio Control VPN Client on macOS.
Choosing the Best VPN for Mac OS
Choosing the best VPN for macOS involves considering various factors to ensure compatibility, security, performance, and ease of use. Here’s a guide to help you select a VPN service that meets your needs on a Mac:
1. Security and privacy
- Encryption standards: Look for VPNs with solid encryption protocols like AES-256 to protect your data from interception.
- No-logs policy: Ensure the VPN service has a strict no-logs policy, meaning they do not track or store information about your online activities.
- Kill switch: A kill switch automatically disconnects your device from the internet if the VPN connection drops, protecting your data from accidental exposure.
2. Performance and reliability
- Speed: Consider VPNs known for offering fast connection speeds to minimize the impact on the browsing and streaming experience.
- Server Network: A wide range of server locations gives you more options to bypass geo-restrictions and find servers close to your location for better speeds.
- Stability: Look for a VPN service with a reputation for stable connections to avoid frequent disconnects.
3. Ease of use
- User-friendly interface: On macOS, the VPN should have a straightforward, easy-to-navigate interface, making it simple to connect, change servers, and adjust settings.
- Customer support: Comprehensive support options (like live chat, email support, and extensive FAQs) are essential for resolving issues.
4. Compatibility
- macOS Integration: The VPN should offer a native macOS app that integrates well with the operating system, providing features like automatic startup and seamless updates.
- Multiple devices: If you use multiple devices, check whether the VPN allows simultaneous connections on different platforms under a single subscription.
5. Features
- Split tunneling: This feature lets you choose which apps use the VPN and which connect directly to the internet, which helps access local and international services simultaneously.
- Dedicated IP option: A dedicated IP can be beneficial if you need to access IP-restricted networks or avoid blocklists associated with shared IPs.
6. Price and value
- Pricing plans: Compare the cost of different VPN services, considering the features offered. Look for a balance between price and the quality of service.
- Money-back guarantee: A money-back guarantee allows you to test the VPN service risk-free to see if it meets your expectations.
7. Reviews and Reputation
- Independent reviews: Research independent reviews and user feedback to gauge the VPN’s performance, reliability, and customer service.
- Reputation: Consider the VPN provider’s reputation in the industry, especially regarding privacy, security, and transparency.
Recommendations for macOS
When selecting a VPN for macOS, NordVPN, ExpressVPN, and Surfshark are among the top contenders known for their security, performance, and user-friendly interfaces. Each of these VPNs offers a dedicated macOS app with robust security features, extensive server networks, and strong privacy policies.
Ultimately, the best VPN for macOS will depend on your specific needs, including the activities you engage in online, the level of security you require, and your budget. By carefully considering the factors above, you can choose a VPN service that provides the best balance of security, speed, and usability for your macOS device.
In conclusion, this article has provided a comprehensive guide on installing, configuring, uninstalling, and troubleshooting Kerio VPN Client Mac. Following the steps outlined, users can seamlessly set up and customize their VPN connections, ensuring a secure and private browsing experience. Additionally, troubleshooting tips have been offered to address common issues that may arise during installation or usage.
For more detailed insights into Kerio VPN Client Mac and related topics such as VPNs and cybersecurity, visit the Proxy Rotating website. There, readers can access additional resources, articles, and tools to enhance their understanding and implementation of VPN solutions.
>>> See more:
Vpn professional free unlimited vpn proxy
